Enhancing reality mapping with different perspectives
Comparing vertical and oblique aerial images
Both vertical and oblique aerial images have their own advantages, making them valuable in different reality mapping applications. So how can you choose between the two? This comparison will help you to assess their benefits from the perspective of the specific requirements and objectives of the project or analysis at hand.
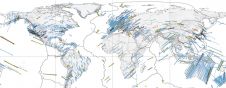
The value of aerial photography was recognized almost immediately after the invention of photography itself. Since then, aerial photography techniques have undergone remarkable advancements. While balloons, kites and even pigeons were initially used, today we have sophisticated tools such as uncrewed aerial vehicles (UAVs or ‘drones’), crewed aircraft and satellites that can capture images of virtually any location on Earth, offering endless possibilities in mapping, problem solving and observation.
To understand the value of aerial photography, it is important to differentiate between the two primary types of images. Both vertical and oblique images have their own advantages and are valuable in different applications. The choice between the two depends on the specific requirements and objectives of the project or analysis at hand.
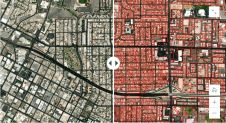
Vertical vs oblique imagery
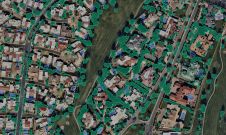
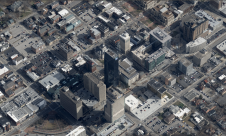
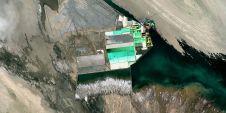
Vertical photographs, often referred to as nadir images, are captured directly downward from the camera to the ground, aligning with a nearly 90⁰ angle. The primary characteristic of these images is the absence of noticeable sides of objects. This ensures a consistent scale, minimizes distortion and offers accurate measurements and precise representation of features on the ground, making vertical imagery ideal for mapping, surveying and cartography applications.
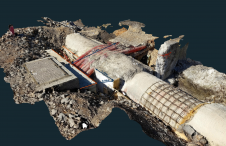
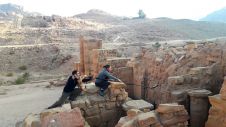
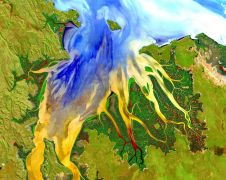
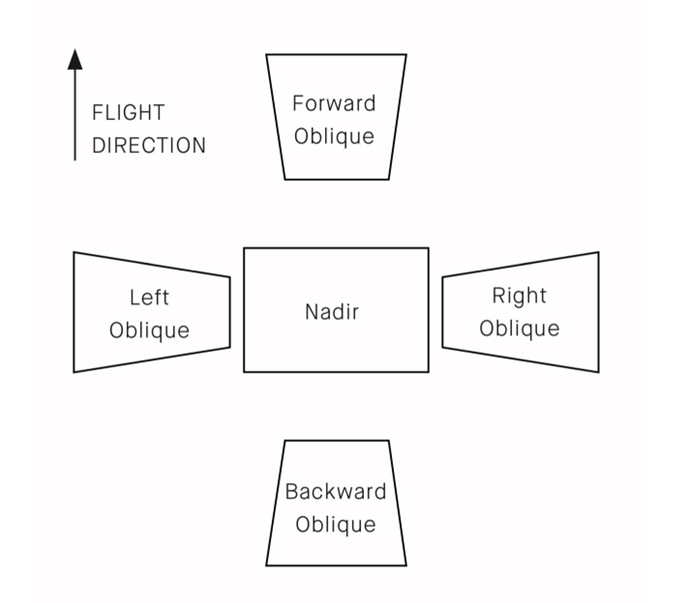
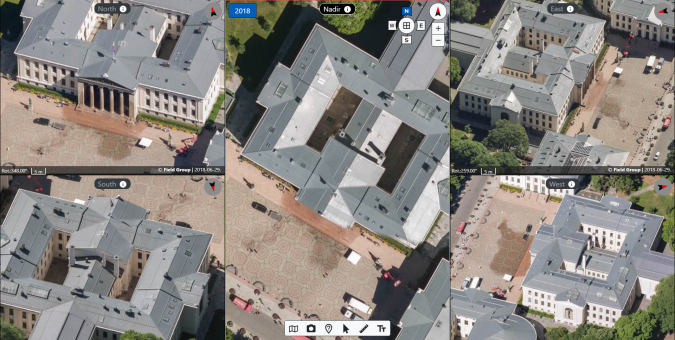
In contrast to vertical imagery, oblique imagery offers a more angled perspective. It is captured at an angle typically greater than 30⁰ from the vertical line. This technique provides a ‘sideways’ view, revealing the sides of structures and other features, lending a more three-dimensional feel to the images. Modern oblique cameras are designed innovatively; they feature one nadir-viewing camera paired with four cameras tilted between 30° and 50°. These angled cameras offer forward, backward, left and right viewing directions, making the imagery extremely versatile. Given its unique perspective, oblique photography adds value in visual inspections, urban planning, real estate marketing and anywhere a more comprehensive spatial context is paramount.
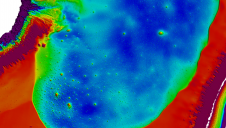
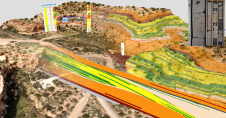
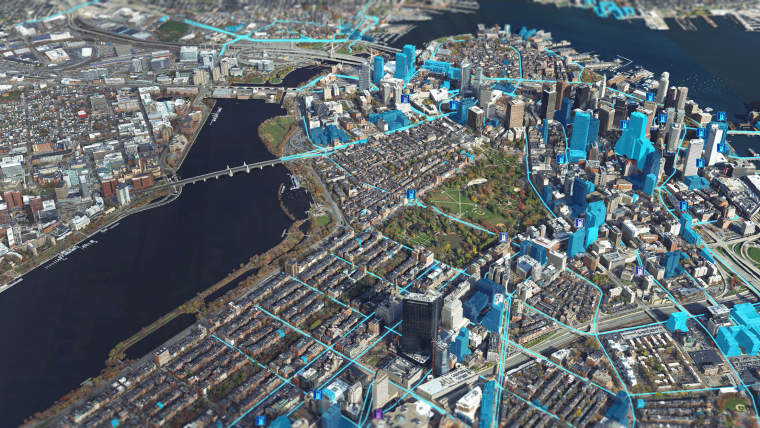
3D reality mapping
3D reality mapping is the process of capturing and recreating the real-world environment in a three-dimensional digital model. This realistic representation allows users to explore, interact with and analyse the environment in various ways that would be virtually impossible in traditional two-dimensional maps. The process has practical applications across diverse industries, from urban planning and entertainment to defence and architecture, engineering and construction (AEC).
Now that the rapid evolution of sensor technology is making data capture more efficient and available for any project, capturing multiple views simultaneously – including nadir and oblique perspectives with matching resolutions – has become a reality and a standard today. As a result, both types of datasets are commonly used for 3D reality mapping production.
Harnessing the power of oblique imagery in 3D models
While it is possible to create 3D models with nadir imagery only, the addition of oblique images significantly enhances 3D reality mapping and the accurate creation of mesh models. Firstly, the blend offers a richer perspective thanks to the multiple angled views of structures and terrains provided by the oblique imagery in combination with the top-down view from vertical or nadir imagery. This makes the 3D mesh models more detailed and comprehensive. Additionally, the angled nature of oblique images adds a natural sense of depth to resulting 3D model, providing a more realistic representation and a clearer context. Moreover, the geometric shape is not enough to create realism in a 3D mesh model; the surface texture is equally vital. Oblique images provide high-resolution details of building facades, which can be used to texture the sides of 3D models, making them more lifelike.
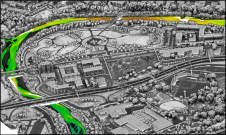
Since oblique imaging captures shadows differently than vertical imaging, the images can be used to enhance the realism of 3D models. Moreover, understanding the play of light and shadow in urban environments can be crucial in specific applications like urban planning. Similarly, oblique imagery provides the required perspective to accurately reconstruct spaces in 3D in urban modelling to understand the space between buildings, ensuring alleys, overpasses and building setbacks are correctly represented. And while buildings are a significant part of 3D urban meshes, the natural environment plays a vital role too. Oblique images help in capturing the side view and therefore accurately representing vegetation and topography such as trees, cliffs and other natural features.
In the final stages of aerial reality mapping, oblique images – with their multiple perspectives – allow for enhanced ground truthing, i.e. a more thorough verification process to ensure that the created 3D mesh is accurate when compared to the real world. Last but not least, oblique imagery offers today’s modern 3D reconstruction algorithms a wealth of data to work with, leading to more accurate and high-fidelity models.

Oblique imagery: advantages and challenges
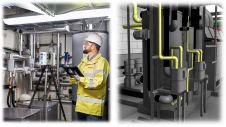
Oblique imagery, with its unique vantage points and perspectives, has found its way into a variety of industries, offering a multitude of advantages. Local governments utilize this technology for tasks ranging from public safety initiatives to urban planning, where it provides urban designers with a holistic view of cityscapes and enables them to make well-informed decisions. The field of property and casualty insurance benefits from oblique imagery’s precision, allowing for accurate property measurements essential for underwriting and claims adjustments. In the realm of roofing, oblique imagery delivers accurate measurements and 3D models, streamlining estimation processes. Real estate marketing is also taking advantage, as potential buyers can gain a comprehensive view of properties, elevating the effectiveness of sales pitches. Furthermore, in the aftermath of disasters, oblique images provide an invaluable perspective on damage to the sides of structures, which might otherwise remain hidden in traditional vertical shots.
Despite its numerous applications, integrating oblique imagery into reality mapping comes with its own set of challenges. One of the foremost hurdles is the sheer volume of data generated by oblique photography, which can strain storage and processing resources. Privacy concerns are another aspect to consider, as the unique angles employed have the potential to inadvertently capture private spaces. Moreover, interpreting oblique images may prove more complex than traditional vertical shots, necessitating the development and utilization of specialized tools and expertise for effective analysis. Addressing these challenges will be key to fully harnessing its benefits across various sectors.
A foundation for observing the world
Advancements in photogrammetry, computer vision and the field of geometry processing now empower the creation of meshes that serve as comprehensive 3D representations, replacing multiple layers of vector and raster data. This optimization saves each element and texture just once, while implementing intelligent level-of-detail management and advanced compression techniques. This not only streamlines data transfer but also enables the seamless delivery of real-world environments to clients via the web.
While both vertical and oblique aerial photography have their distinct merits, their combined use promises a comprehensive, detailed and enriched view of the world. As technology advances, the potential applications and advantages of these methods will continue to grow. Reality mapping is a foundation for many future and existing digital twins, improving the ability to observe the world thanks to rich insights and reducing the risk of making wrong decisions.

7 steps in the aerial reality mapping process
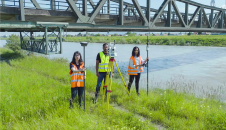
Step 1: Capture
Images of a specific site, object or area of interest are collected using aerial photography techniques such as using drones, crewed aircraft or satellites. Factors like budget, time constraints, area size and government regulations influence the choice of capture method. For instance, drones or aeroplanes may require government approval, while satellite images can be used in situations without such requirements. With high-resolution cameras on the various platforms, images are captured from different angles and perspectives, serving as visual input for creating a digital representation of the real world. The collected images can be nadir, oblique or a combination of the two.
Step 2: Import into software and detect features
The data is important into reality mapping software for detection of unique features or key points within each image. These are specific points or patterns that stand out and can be reliably identified across multiple images, such as the corner of a building or a distinct landmark. The software then compares features between multiple images to find matches. When the same feature is identified in multiple images, it provides a reference point that algorithms can use to understand the spatial relationship between those images.
Steps 3 & 4: Orient and align the images
Based on the matched features, the relative orientation (position and angle) of each image to its neighbours is determined. Triangulation is then used to estimate the 3D coordinates of the matched features. By knowing the position and angle of each camera (from the orientation step) and the position of a feature in each image, the 3D position of that feature in the real world can be deduced.
Step 5: Process data to create geospatial products
Dense reconstruction algorithms go a step further than specific matched features to estimate the 3D position of many more points. This fills in the gaps and creates a dense cloud of points that represents the shape of the scene. Purpose-built algorithms then create a mesh (a collection of interconnected triangles that form a cohesive surface) which serves as the foundational 3D structure of the scene. To make it look realistic, textures are added by ‘draping’ the original images over the mesh (i.e. a portion of one or more source images is projected onto each triangle in the mesh). In areas where multiple images overlap on the mesh, blending algorithms are used to smoothly transition between them, ensuring there are no abrupt colour changes or visible seams.
Step 6: Refine
Post-processing steps to optimize the texture may involve adjusting brightness and contrast, or removing artifacts to ensure the final 3D model is as realistic as possible.
Step 7: Share
The resulting geospatial products can be shared to geographic information systems (GIS) so they are ready for further analysis, such as GeoAI, and they can be easily visualized by stakeholders.
Value staying current with geomatics?
Stay on the map with our expertly curated newsletters.
We provide educational insights, industry updates, and inspiring stories to help you learn, grow, and reach your full potential in your field. Don't miss out - subscribe today and ensure you're always informed, educated, and inspired.
Choose your newsletter(s)